PhotoPatch Pro is an image editing application for Apple iOS iPad devices. It was developed by me specifically to retouch and blend images in the most creative way. In these blog’s pages I’m publishing a series of tips and tutorials to show you how to get the most creative results from it.
With this tutorial I’d like to show you a particular and unique feature of PhotoPatch Pro: its ability to use a real image as selection mask. This opens an entire new world of creative possibilities and experimentations, such as shaping an image by giving the form of another one.
In this example I’m going to make use of PhotoPatch Pro in a less traditional way, because I will work exclusively with the foreground image and its selection mask, basically ignoring the background by letting it transparent.
Here is the my foreground image:

Sunset – Canada – 2011
As you see this is a beautiful sunset’s image that I took during my trip to Canada in 2011.
This second image, a dying tree that I photographed in Sicily, will be used as the selection mask for the first one:
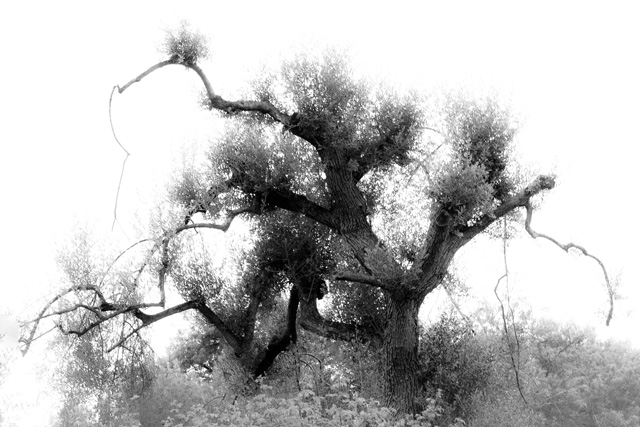
Tree – Sicily
As usual, let’s open PhotoPatch Pro and start creating this new composition.
First I’ll load the background and foreground image. I’ll use the same sunset image for both.
As already explained above, in this tutorial I’m going to work exclusively with the foreground image and its selection. So the background image could be any image because it will be turned fully transparent. However, its frame’s proportions and its resolution are important because this image is the one that is going to be patched with the foreground one and keep the final result. That’s the reason why I chose the same image for both.
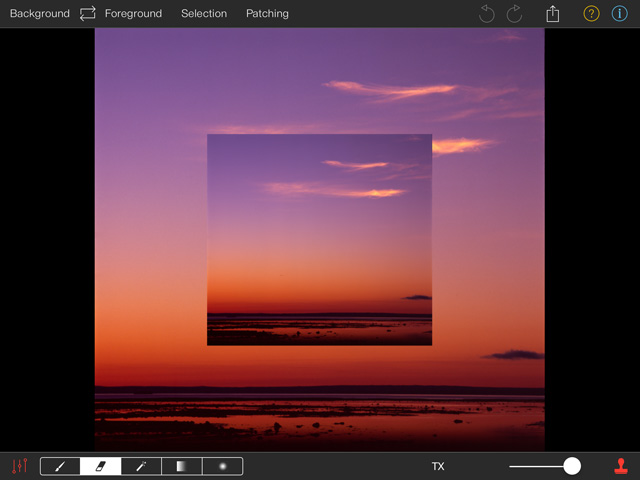
After loading the sunset as background and foreground image. The background will be turned fully black.
I want a black background. The easiest way to do so is by making it totally transparent. The opacity slider, located on the right side of the bottom application bar, acts on the foreground image. So I will first make the foreground totally transparent and then swap the two images to send the transparent one to the background. The swap button is located between the “Background” and the “Foreground” menus (two opposing arrows).
Here is what I got after doing that:
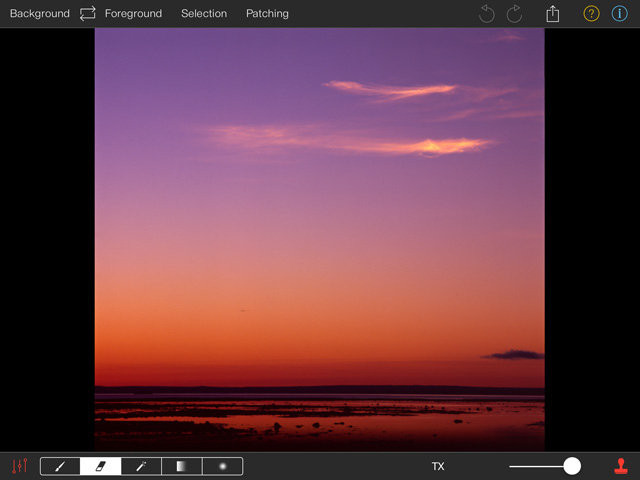
After setting the foreground opacity to zero and swapping the two images.
Now I see only the foreground image. The background is totally transparent and it’s behind the foreground image.
I can now load the selection for the foreground image. Normally at this point I would use a previously saved mask created with the PhotoPatch’s selection tools for a specific image. Here instead I’ll use a real image: the dead sicilian tree presented above. A selection mask can be loaded/saved through the “Selection” menu located in the upper application bar. The image loaded as selection will be automatically stretched to fit exactly the foreground image.
After loading the selection mask our app’s screen should look like this:
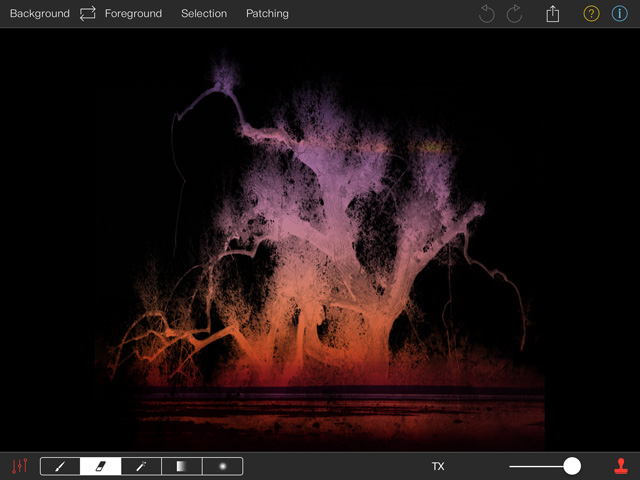
After loading the tree image as the selection mask of the sunset image.
As you can see, the tree image is interpreted as a selection mask. The darker pixels of the tree let the corresponding sunset pixels be shown. Conversely, the lighter pixels mask out the corresponding sunset pixels and let the black background pass through. The resulting image is a sunset with the shape of a tree!
That’s great, we have a first interesting result!
But hey, experimenting is the key to creativity! So what if I invert the mask? I can do this through the “Selection” menu located on the upper application bar.
Here is the result of the inversion:

After inverting the selection mask.
The effect is exactly the opposite of the previous one: a sunset with a tree shape carved into it. The pixels forming the tree are actually unselected pixels of the sunset image which let the black background appear through, just like in a micro drill-work.
I could now try to tune the foreground image to my taste through the color settings and filters in the “Foreground” menu. For example, this is what I get by adding a “Process” color filter and increasing the brightness and vibrance a little bit:
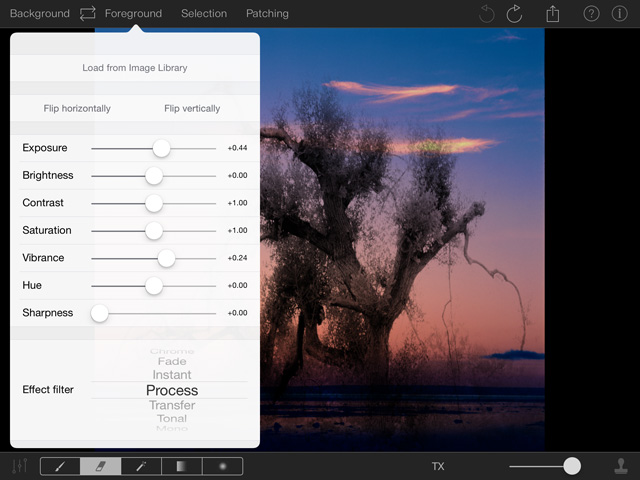
Tuning the color settings and filters of the foreground image.
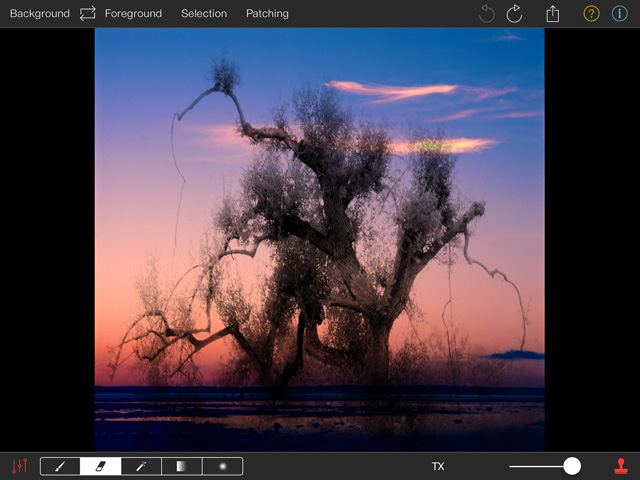
After adding a “Process” filter and increasing the exposure and vibrance a little bit.
In this case I tend to prefer the original one with its warmer colors, so I will save that one as my final composition. This can be done through the “Export/Save” button. It’s important to remember at this point that the “Export/Save” button saves only the background image, because it’s assumed to be the one being patched and thus containing the final image. But in this case my final image is the foreground (masked) one.
So, in order to avoid saving a meaningless black background, I should patch the foreground image onto the background. The patch button is located in the rightmost part of the bottom application bar (the stamp). By just pressing it I’ll get the patched background image.
Now I can finally export/save the background image,
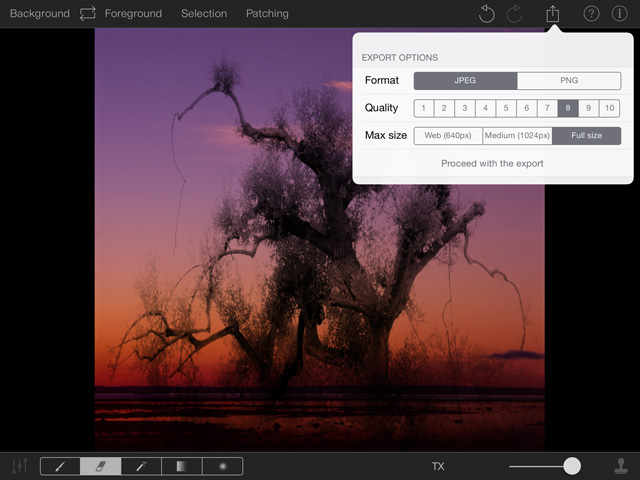
Saving/exporting the final image.
And this is the final exported image:

The final result: a sunset photo negatively masked with a tree image and patched onto a fully transparent background.
Some useful suggestions when using images as selection masks:
- Use contrasty images as selection masks in order to have a well visible selection effect.
- You can create a more contrasty version of an image with PhotoPatch. Just load it as a background image, increase the contrast through the “Background” menu, and save it to the Image Library.
- Keep into account that the image, when used as a selection mask, will be stretched to fit the foreground image frame. Some deformations could be awful, for example when people are involved. In that case it would be better to crop the image to a form factor that is more similar to that of the foreground image before using it as a selection mask.
That’s it for now! I hope that this example has helped you to discover some of the features and creative potentialities of PhotoPatch.
More tutorial and examples will come!
If you like PhotoPatch, please visit the PhotoPatch Official Facebook’s page and contribute by posting your image patches!

Dear PhotoPatch’s lovers,
a new version (2.0) is on the way out, currently under Apple’s approval. It provides the following new features and bug fixes:
– New image effect filter: “Posterise”
– Now the magic-wand has new options to work with non-contiguous areas and to toggle antialiasing around the edges of the selection on or off.
– Image flipping now is way faster.
– Image patching now is faster.
– Fixed a bug that sometimes caused an application crash when patching more than one time on iOS 9.
– Fixed a bug which failed to apply the selection mask before exporting the patched image.
– General bug fixing and performance improvements.
If you like the app, please take the time to leave a feedback on iTunes App Store!
This will give me a motivation to work and enhance it more and more.
Thank you all!
Stay tuned!
After latest update to IOS 9.0.2 the patch button only works one time which pretty much renders the app useless.
If the patch button is selected a 2nd time, the app crashes.
I have deleted the app and downloaded again to no avail.
Please fix.
Hi Rpac, thank you for your kind advice!
I’m currently working on this, an update will come soon!
The crash problem turned to be due to a very bad bug inside iOS 9.0.X. The bug has been fixed by Apple on iOS 9.1 beta, so the next OS release will not suffer of this problem anymore.
In any case, I have found a workaround and will release a fix in the next days.
Thank you for your support and best regards!
Thanks for your quick response and attention to this problem.
Good luck with the fix.
It’s a great app and I look forward to using it to it’s fullest potential.
Thank you Richard. Stay tuned!
PhotoPatch is best app for image blending.
Thank you very much Kevin.
If you like it, please add a positive feedback for PhotoPatch Lite/Pro in the Apple Store!